The Reports Print Preview window
Note: the following feature is only available in version 1.2 (or later) of Logframer
To open the Reports Print Preview window, click on the  button in the General toolbar. Alternatively, you can use the Main menu, by clicking on File → Print preview…
Using the various tab pages of this window, you can get a print preview of the following reports:
- Your logical framework;
- The list of indicators
- The Performance Measurement Framework (PMF)
- The resources table
- The Risk Register (RR)
- Your project’s planning
- The list of partners
- The target group identification form
To get the report you want directly when you open the print preview window, simply click into its related area. For instance, if you want to print your logical framework, you click on one of the cells, and then on the button. For other reports, you must make sure that the Details section is visible by clicking on the  button in the Lay-out toolbar. Then click in the Detail window in the bottom of your screen and finally on the Print preview button.

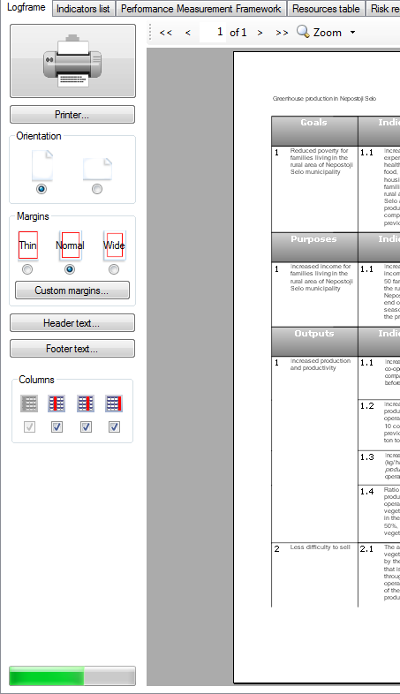
On the left side, you can see the Print Settings Bar. On the right you can find the actual print preview of the report that you selected. Use the Navigation bar above the print preview to view the different pages, either by using the arrows or entering the number of the page you want to see in the text area.
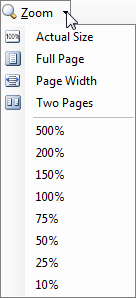
Use the zoom option to get a closer look at the page, or to see two pages at once. If you click on the magnifying glass, the document will be scaled to actual size (100%). When you click the magnifying glass again, you will get a view of the complete page again. If you press on the down arrow next to the magnifying glass, you will get a list of zoom options:
When you open the Reports Print Preview window, or change any of the print options, it can take a while before the report is completed. In that case, you will see a progress bar in the left bottom corner:
The following pages describe printing in version 1.2 and higher. For information on printing in Logframer versions 1.0 and 1.1, you can follow this link.
Print and page settings of reports
For each report, you can set its page settings including the orientation of the page, the page margins and its header and footer, using the Print Settings Bar on the left side of the Reports Print Preview window.
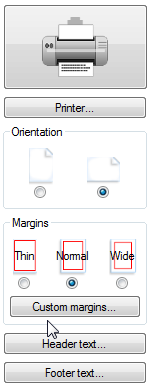 On top of the Print Settings Bar you will immediately spot the big Print button. Press it, and the selected report will roll out of your printer. Underneath the Print button, you can change a number of settings:
- Printer settings: Use the Printer... button to select the printer you want or change printer specific settings (like what paper you want to print on). You can also set how many copies of the document you want, if you want to print recto/verso, in colour or black & white, etc. (provided your printer supports these settings of course). If you want to create a PDF document of your report, you can also install a PDF writer and 'print' to a PDF document.
- Orientation: choose whether you want to have your report in portrait or in landscape mode. Logframer will adapt the spacing of columns automatically, but you may find that the available space becomes too cramped in portrait mode. So for many reports, you may want to switch to landscape mode instead.
- Margins: you can set the margins to thin, normal or wide. Press the Custom margins... button to open a dialog window where you can set the margins manually.
- Header text: click this button to open a new dialog window to set the header text. You can specify a different page header for each individual report, or copy the header of one report to all the other ones. See this page for more information on how to set the header text of your report(s).
- Footer text: click this button to open a new window to set the footer text. You can specify a different page footer for each individual report, or copy the footer of one report to all the other ones. See this page for more information on how to set the header text of your report(s).
You will find these print and page settings options for each individual report. Underneath these basic options you will see report specific options that enable you to change the appearance of that particular report. We will show and explain these options on the corresponding help pages.
Note: for users of Logframer versions 1.0 and 1.1, the Print Settings Bar replaces the Page set-up window.
Headers and footers
For each report, you can set page headers and footers. To do so, press the Headers... or Footers... button in the Print Settings Bar.
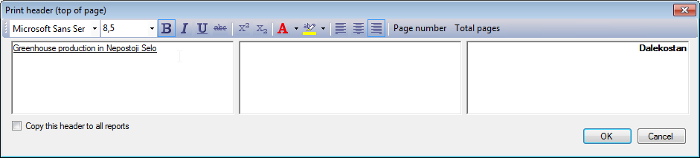
There are three text areas: on the left, the centre and on the right side of the page. If you use all three areas, Logframer will divide the available space between the three areas. If you use only the left and right area, both will get half of the page at their disposal. If you use only one area, it will have the whole page width at its disposal.
You can use all text options that are also available for the logical framework itself (bold, italics, text colour...)
Page numbers
To insert page numbers and/or the total number of pages, you can use the buttons on the right of the toolbar. Simply click with the text cursor on the place where you want to insert the page number, and then click on the Page number button.
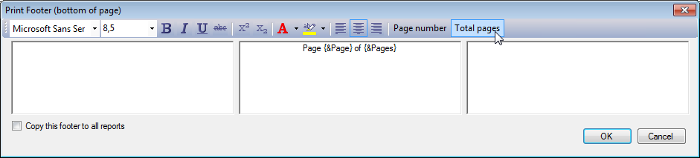
A placeholder text will appear {&Page} that will be replaced by the actual page number in the preview or printed document. You can format this placeholder like you would any other text.
Copy the header/footer to all other reports
If you want the exact same header or footer on all your documents, you can check the Copy this header to all reports option (or Copy this footer to all reports option) on the bottom left of the dialog. When you press the OK button, all other reports get the same outlook.
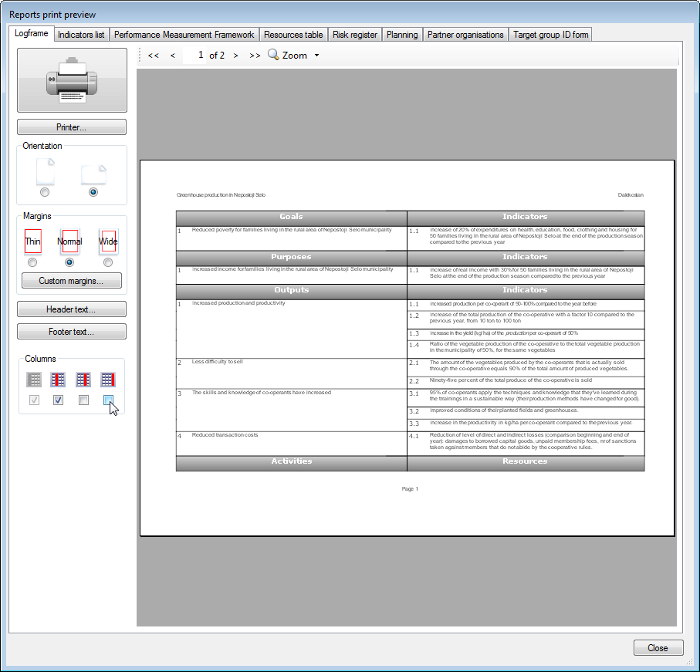
Logframe print preview
If you select the Logframe tab of the Reports print preview window or you've selected one of the cells of the logical framework before opening this window, you will get the following preview:
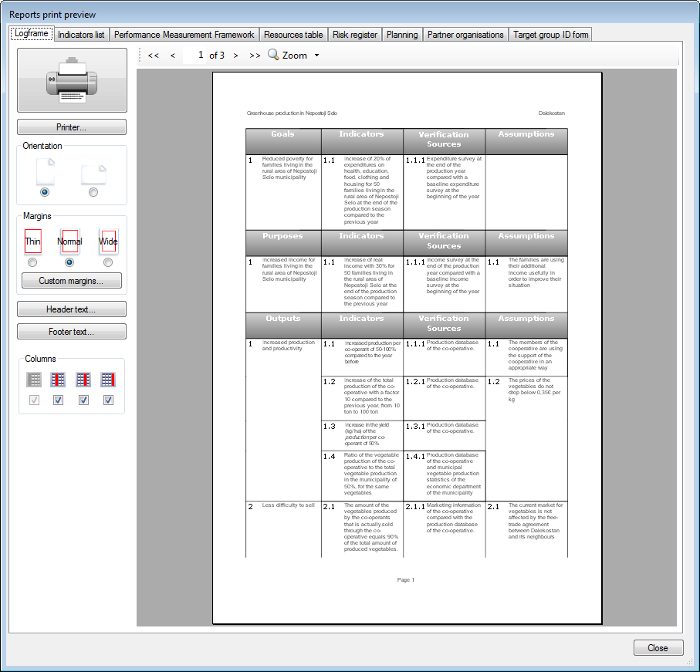
Underneath the usual settings of the Print Settings Bar, you can choose which columns you want to include in your document. This way, you can create different versions of your logframe at the touch of a button, without having to create different versions of the same document as you would in a text editor or a spreadsheet application. For instance, you could print an overview of the risks and assumptions for each objective, without showing the indicators or verification sources:
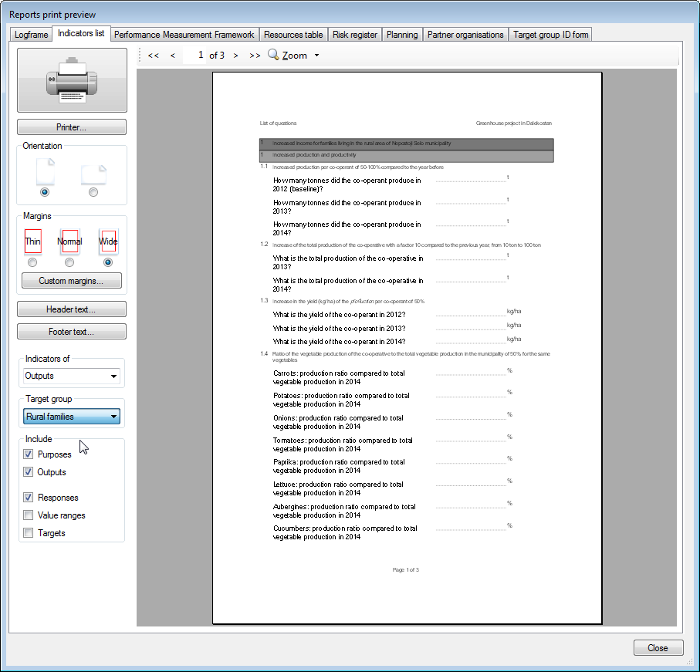
List of indicators print preview
If you select the Indicators list tab of the Reports print preview window or you've clicked in one of the cells of the Indicator details window before opening this window, you will get the following preview:
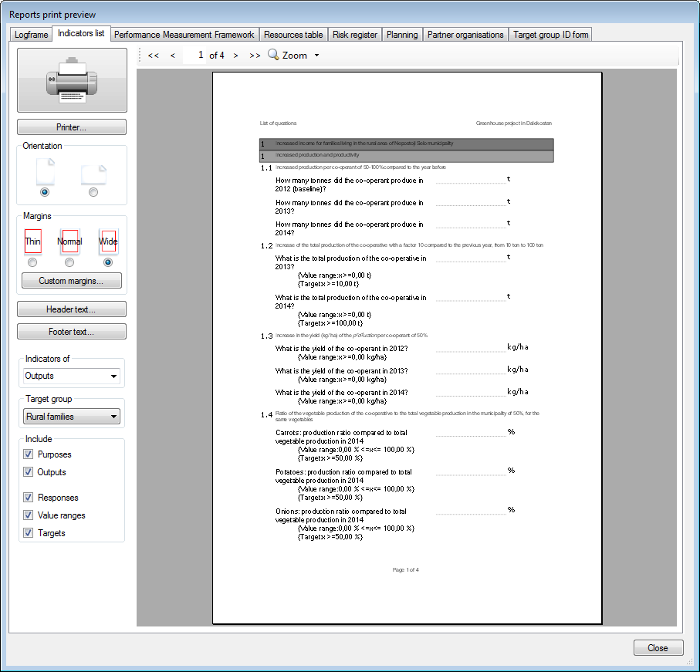
Underneath the usual settings of the Print Settings Bar, you can set different options to select what information you want to include in this report.
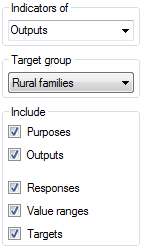 You can select:
- Which indicators you want to include, meaning from which level of your logframe: impact indicators, outcome indicators, output indicators, activity indicators (progress indicators) or all indicators.
- To which target group the indicators belong: when designing indicators, you can set to which specific target group each indicator belongs. This way you can create different documents (questionnaires) for different target groups, only showing the relevant indicators for that specific group. Using the Target group setting, you can select any of the target groups you've identified, or else choose to include all target groups.
- Which type of information to include in the document:
- Purposes and outputs: if you uncheck these options, you will only see the actual questions (indicators) on your form. If you check them, they will be used as headers.
- Responses: if you check this option, you will get the options lists and space to enter the responses to the questions. If you uncheck this option, only the actual indicators will be listed.
- Value ranges and targets: if you check this option, the value ranges and targets will be included in curly brackets {}. If you include the value range, the person completing the list will be able to see what minimum and maximum values he or she has to respect. Including the targets is more for internal use - you probably don't want the respondents to know what the 'right' answer is.
Below you can see an example of a list of indicators without value ranges or targets:
Performance Measurement Framework print preview
The Performance Measurement Framework is tool used for Results Based Management. It is a table that presents an overview about:
- The expected goals, purposes or outputs
- How you will follow-up progress (indicators)
- Baseline information and targets at the end of the project
- What data sources (verification sources) you will use
- How you will collect data
- At what frequency
- Who's responsible for the data collection.
If you select the Performance Measurement Framework tab of the Reports print preview window or you've clicked in one of the cells of the Verification sources details window before opening this window, you will get the following preview:
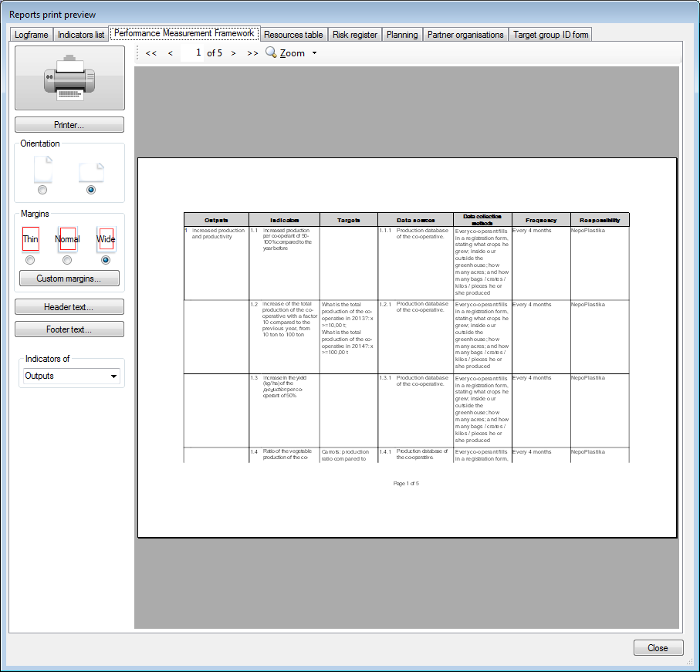
The only option for the PMF table is which indicators you want to include:
- Indicators of the goals (impact indicators)
- Indicators of the purpose(s) (outcome indicators)
- Indicators of the outputs
- All indicators
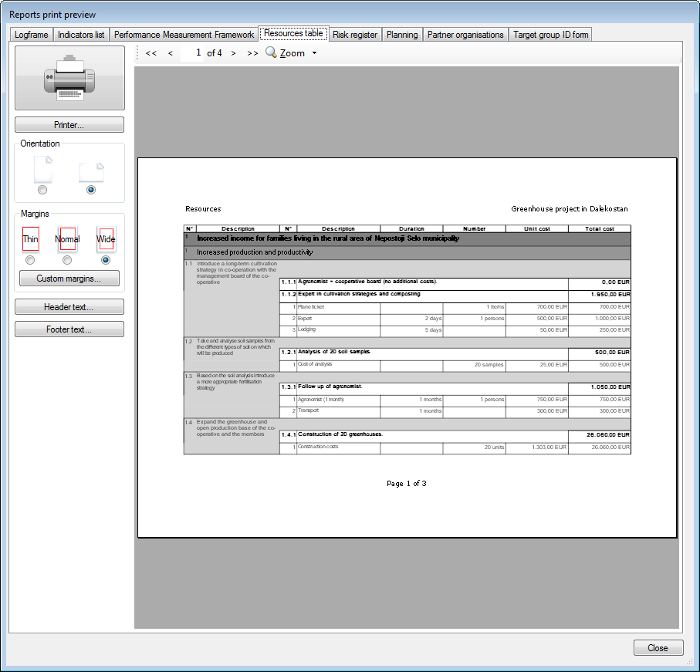
The Resources Table print preview
Note: the following feature is only available in version 1.2 (or later) of Logframer
The resources table gives you an overview of all the resources that are used for each activity. Basically, it is a print-out of the Resources Detail window.
The table of resources is not the same as the budget of the project. In Logframer you can detail costs for each activity, but some of these may overlap between activities. This means that it is not possible to make a correct total for the whole of your project.
The Risk Register print preview
If you select the Risk register tab of the Reports print preview window or you've clicked in one of the cells of the Assumptions details window before opening this window, you will get the following preview:
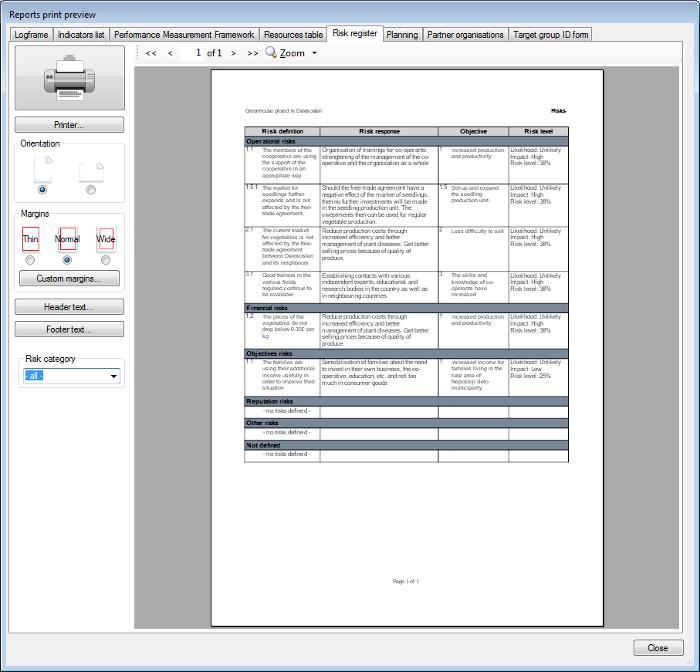
You can select different categories of risks:
- operational risks
- financial risks
- objectives risks
- reputation risks
- other risks
- all risks
Planning print preview
You can open the Planning print preview in two ways. You can either use the Print preview button in the General toolbar, or open the Planning window first and then use its Print preview button.
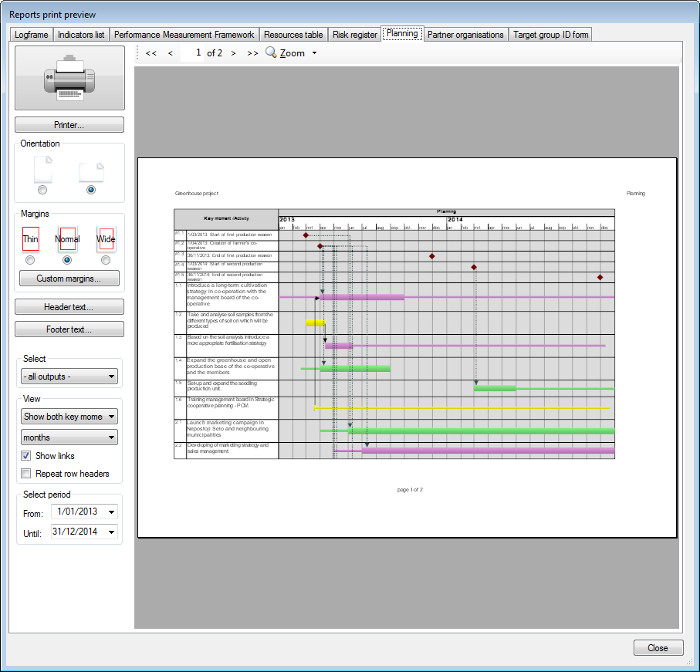
The Planning print preview uses the settings of the Planning window, so if you looked at the day-to-day planning in that window you will also get the day-to-day planning in the print preview. This is important to remember, because if you've selected a long period of time in day-to-day mode and then open the print preview, it may take a (very) long time to complete the preview. In that case you better select a monthly overview of the planning, open the print preview window, then select a shorter period of time and finally select 'View: days'.
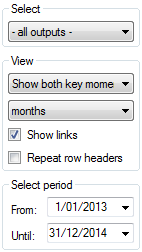
As in the Planning window, you can select which activities you want to see (using the Select drop-down list). You can choose to see both key moments and activities or activities only. You can also show or hide the links between key moments and activities.
With the Repeat row headers check box, you can choose whether you want the row headers with the names of the activities to be printed on each individual page. If you deselect this option, the row headers will only be printed on the first page. On the following pages, you will only see the number of each activity, but not its text:
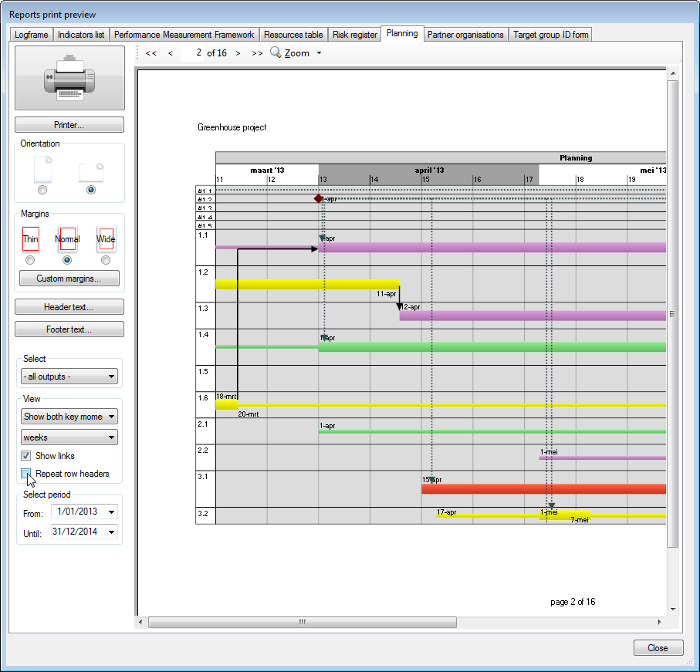
To get a detailed view of a certain period, you can set the starting date and the end date.
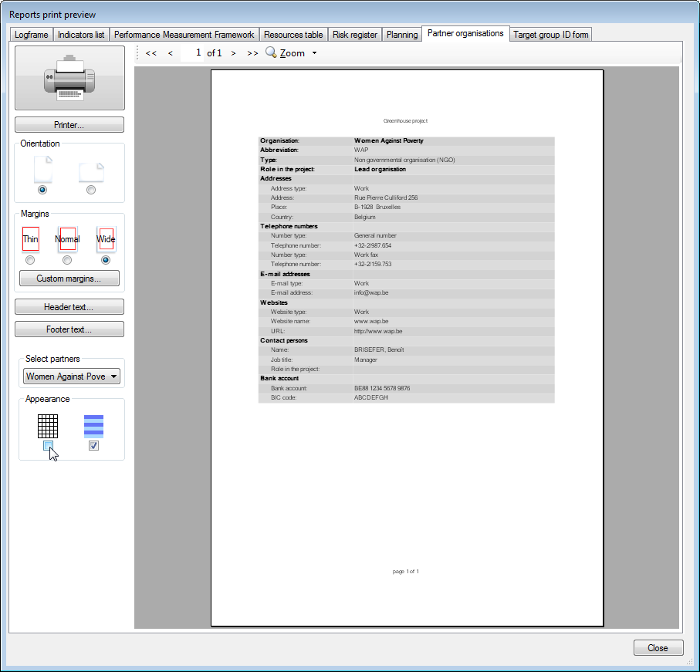
Partner List print preview
If you select the Partner organisations tab of the Reports print preview window, you will get the following preview:
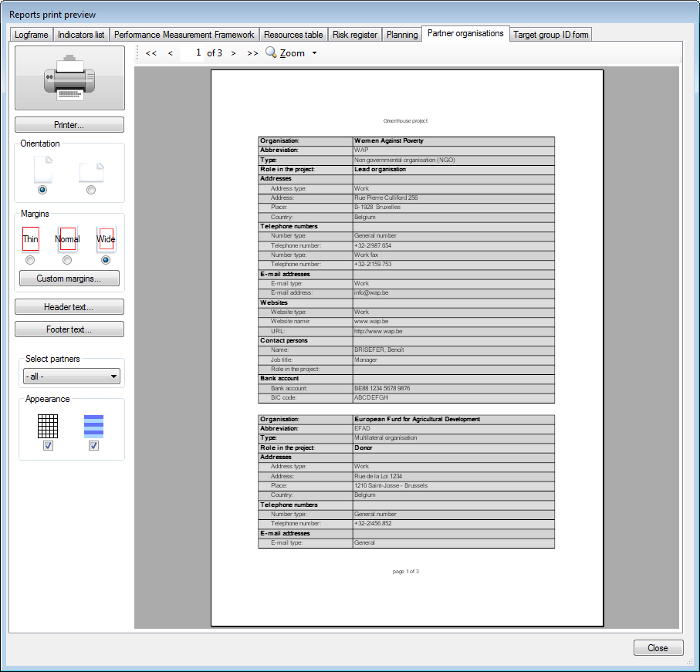
You can select of which partner you want to print the details, or you can choose to print all partners' information at once.
You can change the appearance of the table using the two check boxes at the bottom. You can:
- Add or remove the table grid
- Add or remove colour to the table. The rows of the table will have alternating colours.
Target Group ID Form print preview
If you select the Target group ID form tab of the Reports print preview window or you've clicked in one of the cells of the Target Groups details window before opening this window, you will get the following preview:
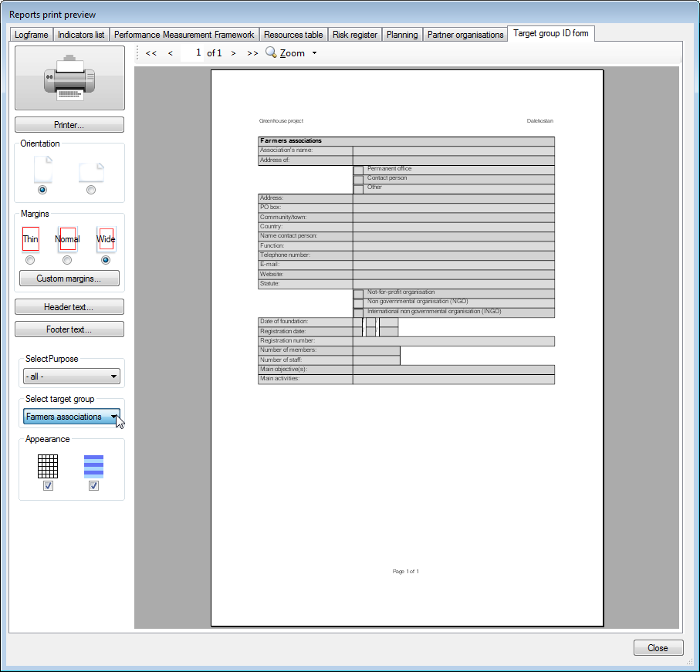
You can select the target group for which you want to print the form. You'd probably want to select just one target group at a time, so you can make many copies of the form and use them in the field. But you can also print all the different forms one after the other in a single document.
You can change the appearance of the table using the two check boxes at the bottom. You can:
- Add or remove the table grid
- Add or remove colour to the table. The rows of the table will have alternating colours.