The Planning window
To open the Planning window, press the  button on the lay-out toolbar. Alternatively, you can select View → Planning in the Menu bar.
The Planning window only gives you an overview of the activities and key moments you've identified. It doesn’t allow you to modify anything. Once you've identified the activities in the logframe window, you need to indicate the starting date and the duration of the activities in the Details window. Similarly, once you've formulated one or more outputs, you can add the key moments.
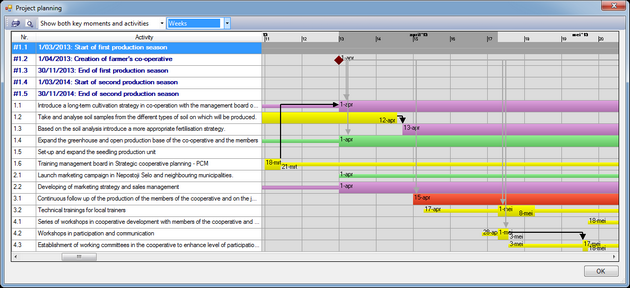
In the picture above, you can see that:
- The key moments are listed on top in blue and their numbers begin with '#'. In the planning overview on the right, you can see the key moments as red diamonds.
- The activities are listed under the key moments in black. The activities themselves are displayed as thick bars, while the preparation and follow-up periods are displayed as thin bars before and after the activities.
- Black arrows show where one activity follows (or precedes) the other. Grey arrows show where an activity follows a key moment.
The activities are colour coded:
|
Activity |
Colour code |
|
Identification, selection, registration |
Orange |
|
Hiring, procurement, logistics |
Light blue |
|
Activities (general), construction, distribution, medical treatment, humanitarian assistance, peace building |
Light green |
|
Research, training, capacity development, awareness raising |
Yellow |
|
Meetings, Travel |
Blue |
|
Evaluations, audits, monitoring |
Red |
|
Other types |
Dark green |
Changing the view of the Planning window
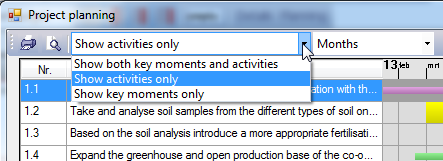
You can use the drop-down menu to select one of three viewing options:
- Show both key moments and activities
- Show activities only
- Show key moments only
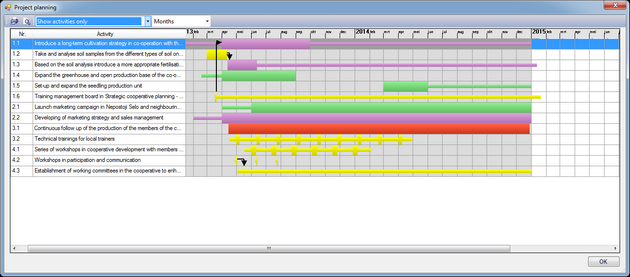
This example shows the activities without the key moments.
Change the timeframe of the Planning window
You can change the level of detail you see in the planning window by means of the second drop-down menu. If you want an overview of the whole project, select 'Years' or 'Months'. When you select 'Months', you will get more information about the activities, in the form of their starting and ending dates. If you select 'Days' you will also see who is doing the activity and where it takes place (provided you filled out all this information in the Activity details window of course).
