Filling out the logical framework
Some people start designing their logical framework by filling out the purpose of the project, and then continue downwards with the outputs and then the activities.
Other find it easier to start with the activities, then group them according to the tangible outputs that these activities produce, and finally they formulate a purpose that includes all these elements.
Whatever your preference, Logframer supports both ways of working. However, if you do start filling out the activities first, the application will automatically add a placeholder output and purpose:
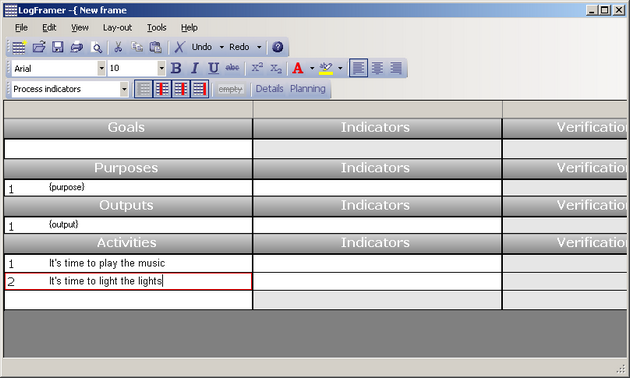
When you’re ready to define the output or purpose, just click on the cell and the {output} or {purpose}-placeholder will disappear.
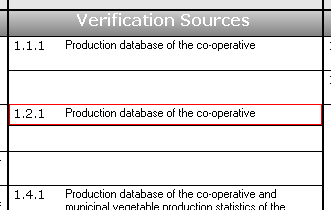
A similar thing happens when you fill out an indicator or an assumption when the corresponding goal, purpose, output or activity isn’t defined yet, or when you define a verification source without first adding an indicator.
The colour of the indicator, verification source and assumption cells that don’t have a corresponding goal/purpose/output/activity is grey. The same goes for verification source cells that do not yet have a corresponding indicator. The colour of the cell turns white once you’ve filled in the parent item.
Working with text
You can modify the appearance of the text in the logical framework itself – and in the Label-columns of the Indicator Details window – like you would in any text editor. To change the font, the size, the text colour and other characteristics, you can use the Text toolbar:

Selecting text in a cell
To type text in an empty cell, just click on the cell once and start typing. The text will be in the font and size that you’ve last selected. To edit existing text, you have to make sure that the cell is in text edit mode: click once to select the cell and then again to insert the cursor in the place you want it. Select text by dragging the cursor or by double-clicking to select the whole word, or by triple-clicking to select all the text in the cell.
Modifying the text
You can:
- Change the font
- Change the size of the text
- Make your text bold, italics or normal
- Underline or strike through your text
- Make your text superscript or subscript
You can do this with any text in the logframe itself, and with the text in the Label columns of the Indicator Detail window.
In addition, you can change the colour of the text itself. You can also change the colour of the text’s background, using the Marker tool.

Note: although the text tools allow you to light up your logframe like a Christmas tree, it is probably not a wise thing to do if you have any hope on getting donor funding, or anyone actually reading it. You should use the text tools mainly while designing your logframe, for instance to indicate pieces of text that still need some work or that you aren’t sure about. In the final version, you may want to limit yourself to putting a few keywords in bold text.
Paragraph options

You can outline the text in a cell to the left and right, or centre it. Logframer does not support bullet points or numbering inside cells. The idea is that you use one cell to express one idea.
Selecting and modifying the text of different cells in one go
If you want to change text and paragraph options in different cells, you can click them one by one, but that may become a long and tedious process. However, it is possible to change the text in different cells at once. You can even change all the text of your logframe and in the detail windows in one go.
In the Menu bar, go to Edit → Select… to see the different options:

You can:
- Select all text that can be edited. This is the text of all the cells in the logframe, and the text columns of the indicator and budget detail window. You can also press <Ctrl><Shift><A> as a shortcut.
- Select all text in the project logic column of the logframe (goals, purposes, outputs and activities) or press <Ctrl><Shift><L>.
- Select all text of the indicators column (or press <Ctrl><Shift><I>).
- Select all text of the verification sources column (or press <Ctrl><Shift><S>)
- Select all text of the assumptions column (or press <Ctrl><Shift><U>).
- Select all resources (bottom section, second column and third column next to the activities) (press <Ctrl><Shift><R>)
- Select the text of certain items in the details window:
- Select all responses: this selects the text columns of the indicator details window
- Select all budget items: this selects the text columns of the budget items details window.
When you've selected the text, you can change the typeface, the font size, change it into bold, italics, etc.
Copying and moving text around
In Logframer, you can copy or move text in the following ways:
- You can select text in a cell of the logical framework, or in one of the fields in the detail window, and cut or copy the text;
- You can move or copy one or more cells in the logical framework;
- You can change the order of elements in the details window;
- You can copy the answers of one indicator to another;
- You can copy the response structure of one indicator to another.
Cutting, copying and pasting text

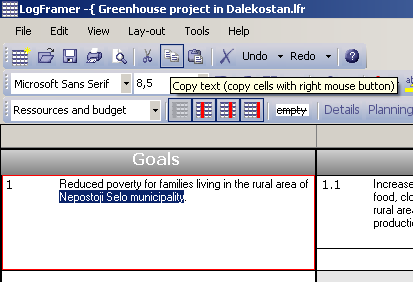
You can cut, copy and paste text within a cell of the logframe, using these buttons in the Main toolbar.
- Click on the cell that contains the text you want to cut or copy. The cell will be marked by the red selection rectangle.
- Click and drag to select the words that you want to cut or copy.
- Click on the Copy button (or press <Ctrl> + <C>), or on the Cut button (or <Ctrl> + <X>)
- Select the spot where you want to paste the text
- Press the Paste button (or <Ctrl> + <V>)
You can select and cut, copy or paste text in the same way in the Details window.
This way, you can also move or copy text between Logframer and other applications such as Microsoft Word™. However, if you want to copy a lot of text from a logical framework that you’ve made in Excel to Logframer, you’re probably better off using the Import function.
Copying and moving cells within the logframe
Using the right mouse button, you can copy or move one or more cells within the logframe.
To move one or more cells:
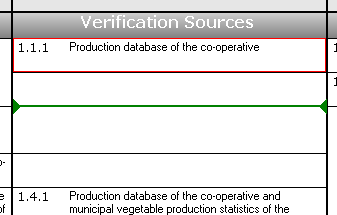
- Select a cell by left-clicking on it. Alternatively, you can select multiple cells by dragging your mouse while keeping the left mouse button depressed, until all the cells you want to move are marked by the red selection rectangle.
- Right-click anywhere within the red selection rectangle and while keeping the right mouse button depressed, drag towards the place you want to paste the cells. You will see a green indicator line to show you where the cells will be pasted when you release the right mouse button.
- Release the right mouse button to paste the cells.
To copy one or more cells:
- Follow the same procedure, but keep the <Ctrl> button on your keyboard depressed to copy the cells instead of moving them.
 |
 |
Referential integrity while moving or copying cells
When you’re moving or copying, you’re not just displacing some cells like you would in a spreadsheet. As we’ve explained earlier, the different items in the logical framework are linked to each other. Logframer will manage these relations for you when you copy or move.
For instance, when you copy/move an indicator to another location within the indicator column, Logframer will copy/move its verification sources with it. However, when you move or copy an indicator to another column, Logframer will only move/copy the text of the indicator to that new place. The verification sources will remain where they were, and instead of the old indicator text, you will see ‘{indicator}’ in that cell.
- When you move/copy an item within the same column, for instance an indicator from the first goal to the indicator column of output number three, Logframer will move/copy the item including it’s horizontal children:
- An indicator will be copied with its verification sources
- A goal, purpose, output or activity will be copied with its indicators (and their verification sources), and its assumptions.
- When you move/copy an item from one column to the other, only the text of the item will be moved to the new column. The horizontal dependencies will remain in place and a placeholder text will appear (for instance ‘{indicator}’)
- Vertical dependencies:
- When you move a purpose that has outputs to another section (the goals, the outputs or the activities section), Logframer will leave its outputs and activities in place and display ‘{purpose}’ where its text used to be.
- When you move an output that has activities to another section (the goals, the purposes or the activities section), Logframer will leave its activities in place and display ‘{output}’ where its text used to be.
Changing the order of items in the Details window (moving items)
Note: the following feature is only available in version 1.1 of Logframer
When you create an indicator, you have the possibility to formulate a number of responses or sub-indicators in the Details window. Similarly, you can detail a resource with a number of items and their respective cost.
It is possible that at a later stage you would like to change the order in which these items are appearing. You can do so by using the right mouse button, just like you would in the logical framework. Just press the right mouse button on the item you would like to move, and drag it to the new location. A green indicator line will show you were the item will be inserted when you release the right mouse button.

Copying responses from one indicator to the other
If you want to copy a response from one indicator to another indicator, select the response in question by clicking on the row header:

Next in the Main menu bar, select Edit → Copy response item, or press <Ctrl><Shift><C>.
Then in your logframe, click on the other indicator. Select the detail window again by clicking on any of the responses. Then go back to the Menu bar and click on Edit → Paste response item, or press <Ctrl><Shift><V>. The response will be added to the end of the list of responses of that indicator.
Copying the response structure of one indicator to another
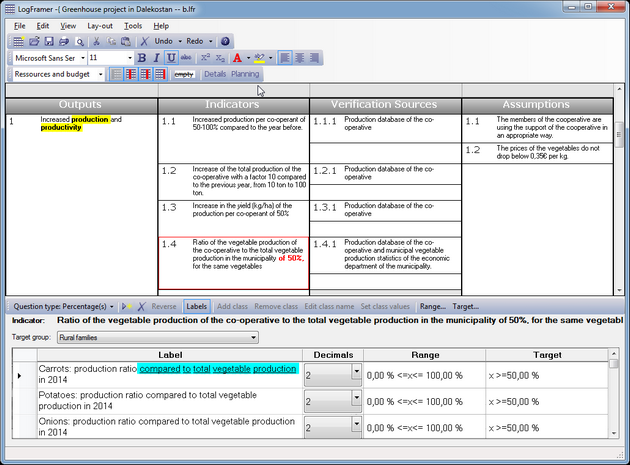
Let's say you've defined an indicator with a complex structure. In the example below, we see a number of sub-indicators. The response structure is that of a multiple choice question, with five columns or classes.
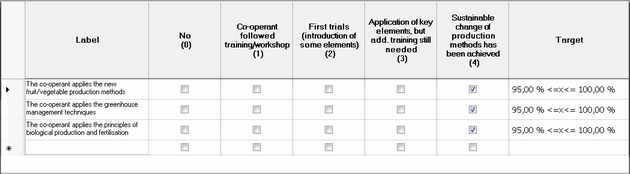
This response structure may be interesting for another indicator, but you may not want to copy the sub-indicators and their targets. So instead of copying the whole indicator with all its responses, in this case you can copy the response structure (the five columns between the Label and Target columns) to another indicator.
Steps:
- Click on the first indicator, that has the response structure you want to copy.
- Go to Edit → Copy structure of responses in the Menu bar, or press <Ctrl><Alt><C>.
- Click on the other indicator
- Go to Edit → Paste structure of responses in the Menu bar, or press <Ctrl><Alt><V>.

You can see that the response structure has been copied, but none of the actual responses.
Note that this action also changes the question type. If the question type of the second indicator was set to Open ended question before, it will change to multiple choice question after you paste.
Deleting logframe items
To remove an item from your logframe:
- Click on it to select the item
- Press on the Delete button
 to remove it
When the item has dependencies, Logframer will show a warning:
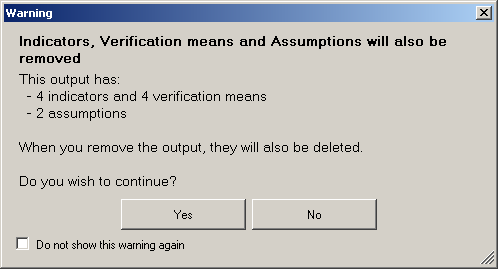
Click <Yes> to delete the item anyway. If you want to remove an item without removing its horizontal dependencies, simply click into the cell and clear the text.
The vertical dependencies will not be removed. For instance, when an output has activities, the text of the output will be set to ‘{output}’ and its indicators, verification sources and assumptions will be removed. However, its activities will remain.