Panes
There are three different panes that you can make appear:
- The Details pane: when you select an item (goal, indicator, assumption, budget item...) in the main window, you can see and modify the detailed options of this item in the Details pane. You can find the Details pane at the bottom of the window and show/hide it using the button in the Views section of the Lay-out toolbar
- The Clipboard pane: there are two different clipboards, one for items - meaning that you can copy an entire item such as an indicator with all its options, targets, etc. - and one for text only. The clipboard pane appears on the left of your screen.
- The Exchange Rates pane: this is only available for the Budget window and allows you to manage the different currencies and exchange rates that you may need for your financial calculations.
Details pane
In the Lay-out toolbar, click on the Show Details button in the View section to show the Details pane on the bottom of your screen.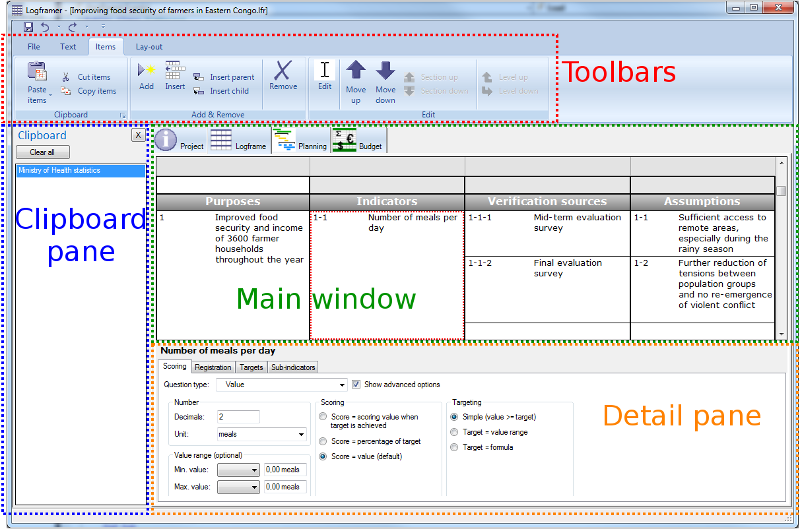
The content of the Details pane depends on which item you've selected
Logframe:
- Goal: project information (title, duration…)
- Purpose: add, edit and remove target groups. Double click on a target group to edit its name and the number of women/men you expect to reach. You can also determine which fields you want to include on the Target Group Information Form
- Output: add, edit and remove key moments or milestones on your planning
- Activity: set the activity's starting date and duration, who will organise it and where, the preparation and follow-up period and optionally when and how often it will be repeated
- Indicator: choose the type of indicator (value, multiple choice, yes/no…), the unit (items, kg, persons…), how it will be scored etc. You can also set the baseline and identify targets to be achieved over the course of the project. If you measure at the level of each beneficiary you can also determine how these data should be aggregated (sum, average…). Finally if the indicator has sub-indicators you can see how their values or scores add up and set the way the scores of the sub-indicators should be totalled.
- Verification source: describe who will collect information, how often and from what information sources
- Risks, assumptions and dependencies: manage the information from the fourth column and specify them according to the RAID principle. Describe how they can influence your project, how you will monitor them and what your strategy is should things go wrong.
- Resources and estimated budget: once your budget is established, you can select different items from you budget and indicate the percentage that you will need as a resource for a particular activity (and output). Alternatively, you can just enter a ballpark figure as an estimated total for a particular resource.
Planning
- Activity: set the activity's starting date and duration, who will organise it and where, the preparation and follow-up period and optionally when and how often it will be repeated
Budget
- Budget item: get an overview of which activities/outputs will make use of this item and to what degree (percentage). If the budget item's total is a percentage of another item or total, you can set the ratio (percentage) here.
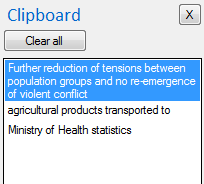
Clipboard pane
You can access the Clipboard pane either from the Text Toolbar or from the Items Toolbar. Both have a Clipboard section on the left. Click on the More… icon in the bottom right corner of the section to show the respective clipboard.
- Text clipboard: If you cut or copy pieces of text, they will be listed here.
- When you cut or copy an item (goal, purpose, output, activity, indicator, assumption, budget item…) it will be added to this list.
When you paste (using the Paste button or by pressing Ctrl+V), the top item from the list will be pasted. Alternatively, you can select an item from the list and then press Paste or Ctrl+V.

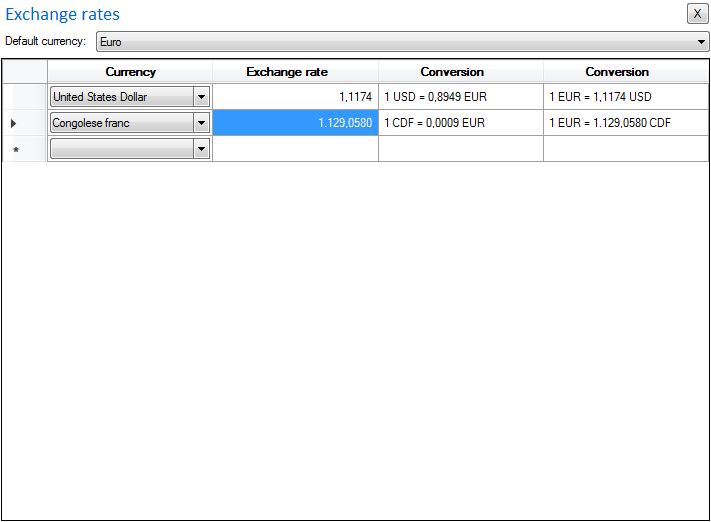
Exchange rates pane
It is possible you have to work with many different currencies and you want to calculate prices in the original currency and then get a total in your project's main currency.
The exchange rates pane allows you to set the exchange rate for every currency you use that is different from your project's main currency. Once you've set the exchange rate, the totals will be calculated automatically.
Also, if you have to update this exchange rate you don't have to change each individual budget item. Instead you change the rate in the Exchange pane, and then all the items that use this currency will be updated automatically.