Creating reports and project management tools

Logframer not only helps you to reflect and develop a well-constructed project. It can also help you create tables and overview for your project documentation AND develop instruments to help you manage your project.
There is absolutely no obligation to fill out each and every field, column and list in Logframer. The idea is to offer you the tools you need to develop a project that suits you and the needs of your clients or beneficiaries. However, if you need certain tools or reports, you must complete certain information.
In this section of the manual we'll treat the following topics:
- Overview of the tools that Logframer can create
- Overview of the reports that Logframer can make
- Printing reports and options for report headers and footers
- Exporting reports to Microsoft Word™
- Exporting reports and tools to Microsoft Excel™
Tools
You can create the following project management tools in Logframer:
|
|
Excel |
Word |
Tool |
What can you do with it? |
What do you need to complete? |
|
|
X |
|
Follow-up of project over its entire duration: monitoring indicators and compare them to baseline and targets. The monitoring tool is the basis of your (upward & downward) accountability |
Identify indicators in the logframe Select monitoring deadlines (in Project info window) Identify target groups in the Project info window if you want to specify certain indicators for certain target groups Use Indicator Detail pane to specify question type, value ranges, scoring, baseline and targets |
|
|
X |
|
X |
Create questionnaires for interviewers to use, or to hand out to beneficiaries to complete |
Identify indicators in the logframe Use Indicator Detail pane to specify question type, value ranges, scoring, baseline and targets |
|
|
X |
X |
|
Follow-up the evolution of (potential) risks over the course of the project: likelihood, potential impact on the project and risk percentage |
Identify risks in the logframe Select risk monitoring deadlines (in Project info window) Use Assumption Detail pane to identify likelihood, impact and response strategy |
|
|
X |
|
X |
Register the details of (potential) beneficiaries, identifying them by name and location and registering any other information you find important |
Add target groups to the Target groups list on the Project information window |
Reports
You can generate the following reports:
|
|
Excel |
Word |
Report |
What can you do with it? |
What do you need to complete? |
|
X |
X |
X |
Design phase: develop logframe with (potential) beneficiaries during workshop; exchange & develop the logframe with partners Include logframe in funding applications towards donors Include logframe in Project documentation as reference during implementation Use and adapt logframe during implementation |
||
|
X |
|
X |
Design phase: exchange & develop the planning with partners Include planning in funding applications Include planning in Project documentation as reference during implementation Use and adapt planning during implementation |
Identify key moments in the Planning window or in the key moments list of each output (logframe) Identify processes and activities in the Planning window or in the logframe Use Activity Detail pane to specify start date, duration, preparation & follow-up periods, practical organisation and repetition |
|
|
X |
X |
|
Design phase: exchange & develop the budget with partners Include budget in funding applications Include budget in Project documentation as reference during implementation Use and adapt budget during implementation |
Choose between simple or multi-year budget Optionally use one of the budget templates List budget headers and budget items in the budget Specify unit cost, number of items and/or duration for each budget item |
|
|
X |
X |
X |
Design the basis of your monitoring framework by identifying which information you need to follow-up different objectives, what the baseline and targets will be, how you will find the information, how often you will monitor and who is responsible for monitoring that information |
Identify objectives, indicators and verification sources in the logframe Select monitoring deadlines (in Project info window) Use Indicator Detail pane to specify question type, baseline and targets Use Verification Source Detail pane to specify frequency and who is responsible for monitoring Alternatively, you can print an empty PMF and use that template to design the performance measurement system. Then you can use this information to complete in Logframer |
|
|
X |
|
|
Include Resources table in funding applications Project documentation: Provides an overview per output and activity which resources you will need and an (indicative) budget |
Identify objectives, activities and resources in the logical framework For each resource: specify an approx. total amount Or Design your budget in the Budget window For each resource: use the Resource Detail pane to add items from your (Total) budget and specify which percentage of the budget item will be used for this resource. |
|
|
|
|
X |
Risks table |
Include Risks table in funding applications Project documentation: Provides an overview of the risks you identified, how you will deal with that risk, which objective it may threaten or influence and the baseline assessment of the likelihood and impact of the risk |
Identify risks in the logframe Use Assumption Detail pane to specify likelihood, impact and response strategy |
|
X |
|
X |
Design phase: identify assumptions; determine how they can be validated and follow-up how you will validate them. Include Assumptions table in funding applications Project documentation |
Identify assumptions in the logframe Use Assumption Detail pane to specify likelihood, impact and response strategy |
|
|
X |
|
|
Design phase: identify dependencies and how they will influence your project Include Dependencies table in funding applications Project documentation |
Identify dependencies in the logframe Use Assumption Detail pane to identify the type of dependency, to specify deliverables and response strategy if the deliverables are not available |
|
|
X |
|
X |
Information on partners and contacts |
Design and implementation: keep an overview of the people and organisations involved in the project Use the Collaboration toolbar to contact them by e-mail, skype, telephone or mail Funding applications: provide an overview of your partner organisations |
Complete information about partner organisations and the people that work for them in the Project information window (tab Partners) |
Printing reports
To print a report, go to the Reports toolbar and select a report in the Reports section. Use the up/down buttons to scroll in the list of reports. Click on the drop-down button in the bottom right corner of the Reports section to get the complete list of available reports.
When you click on a report, you will get the print preview window:
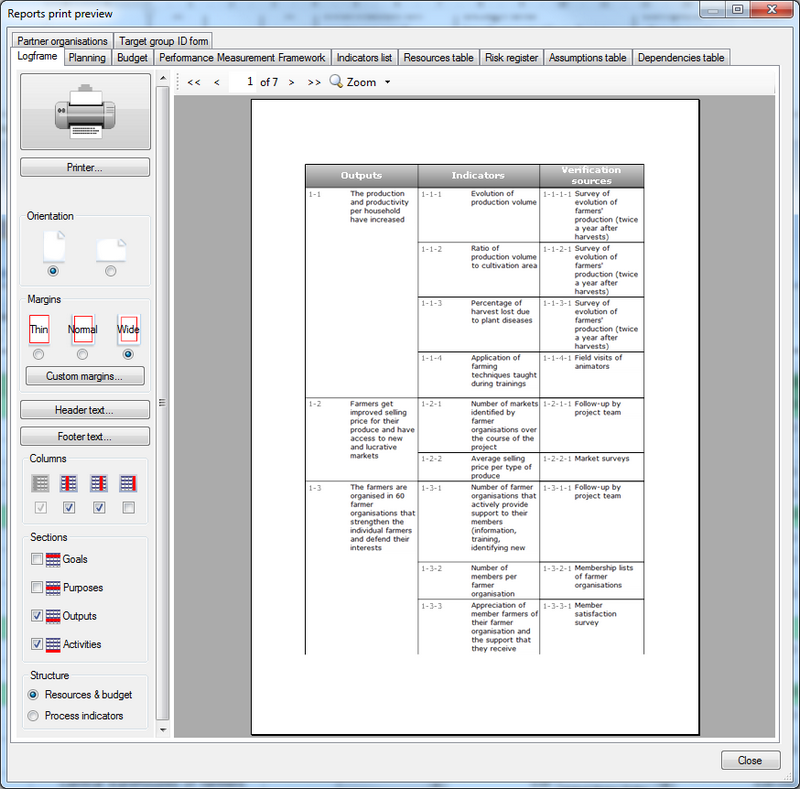
On the left side of the print preview window, you can see the print settings bar. On the right side you can see the print preview of the report in question. You can look at other reports by using the tab selectors at the top of the window.
Print settings:
- Click the big printer button to start printing on your default printer
- Use the Printer… button to select another printer or set specific settings for your printer
- Choose portrait or landscape orientation. Logframer will present some reports by default in landscape mode because they are relatively wide because of their nature
- Select thin, normal or wide printer margins. You can also set custom margins using the Custom margins… button
- Set the header text. You can optionally copy the header text to all report headers of your project.
- Set the footer text. You can optionally copy the footer text to all report footers of your project.
Report specific settings: these can be found below the general print settings. They allow you to print only certain types of items or information.
Width: enter how many pages wide the report can be. It is possible that the report needs more space than you wanted, so Logframer will increase the number of pages.
Headers and footers
For each report, you can set page headers and footers. To do so, press the Headers... or Footers... button in the Print Settings Bar.
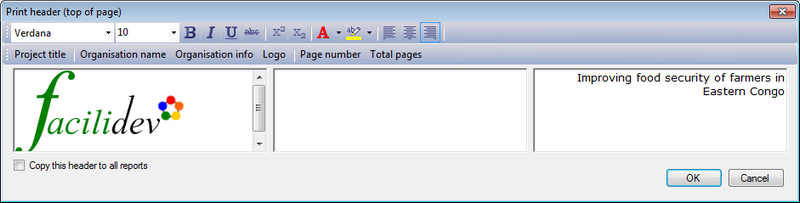
There are three text areas: on the left, the centre and on the right side of the page. You can use all text options (bold, italics, text colour...)
Insert project title
To insert the title of the project, click on the Project title button in the bottom toolbar
Insert organisation info and logo
If you've used the My organisation dialogue to provide details about your organisation (name, address, logo, etc.), you can use three buttons to insert this information directly in your header:
- Organisation name
- Organisation info: name of your organisation plus main address, main e-mail address and website
- Logo: inserts the logo of your organisation if you've loaded it in the My organisation dialogue
Insert page numbers and the total number of pages
To insert page numbers and/or the total number of pages, you can use the buttons on the right of the toolbar. Simply click with the text cursor on the place where you want to insert the page number, and then click on the Page number button.
A place-holder text will appear {&Page} that will be replaced by the actual page number in the preview or printed document. You can format this place-holder like you would any other text.
Copy the header/footer to all other reports
If you want the exact same header or footer on all your documents, you can check the Copy this header to all reports option (or Copy this footer to all reports option) on the bottom left of the dialogue. When you press the OK button, all other reports get the same outlook.
Exporting to MS Word
To export a report to Microsoft Word, go to the Reports toolbar and click on the drop-down button with the MS Word logo. A list of available reports to export will appear
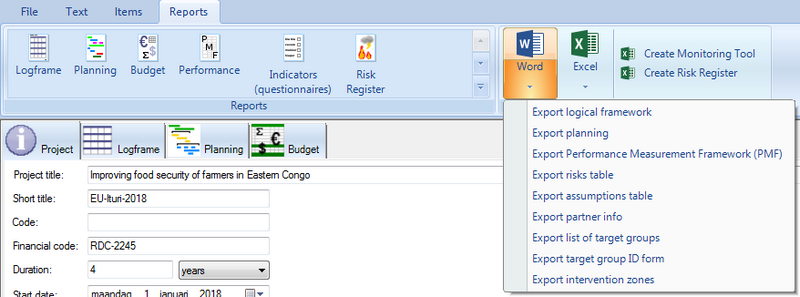
- Logical framework
- Planning
- Performance Measurement Framework
- Risks table
- Assumptions table
- Partner info
- List of target groups
- Target group identification form
- Intervention zones
When you select one of these reports, the Export to Word dialogue will open:
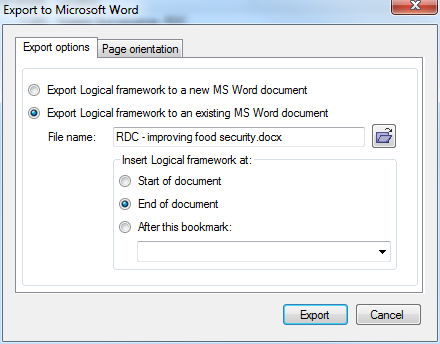
There are two main export options:
- Export the report to a new Microsoft Word document.
- Insert the report into an existing MS Word document, for instance a project proposal that describes the project in general. You can insert the report:
- At the very start of the document
- At the end of the document
- Right after a specific bookmark
If you click on the tab 'Page orientation', you can select the page orientation of the report:
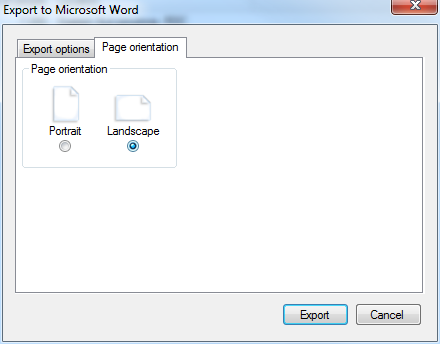
For some reports, other options will be available. In such a case an additional tab will appear.
Exporting to MS Excel
To export a report to Microsoft Excel, go to the Reports toolbar and click on the drop-down button with the MS Excel logo. A list of available reports to export will appear
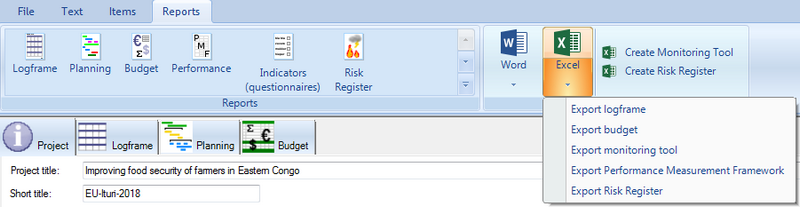
All these reports are exported to a new MS Excel document. This means you can’t insert a report into an existing document like you can when you export to MS Word. Depending on which report you choose you may get a dialogue with export options.